|
So you must be wondering Why Manga Storyboards are the Blueprint of Comics? Manga storyboards are important to creating manga. They are the blueprint to creating your manga and comic. In this in-depth guide, we are going to learn about What is a storyboard for manga? Why do you even a storyboard for your manga? Then we go into the use of panels and using flow and going into how to structure your storyboard. Using the 3 C's Continuity is making sure that each panel makes sense to the last panel. Composition how the artwork in your storyboard panels is used and the contents framed in a way that is interesting to the reader. Clarity is making sure that your storyboard is clear and easy to read with your artwork and your dialogue. Then we go into different types of panels looking at the unconventional as well as manga spread pages everything you would want to think about in creating your storyboard is here because this is definitely a complete blueprint to make your storyboards set up for the next part of the process. Next time we are getting into clip studio a full guide on how to make manga with it.
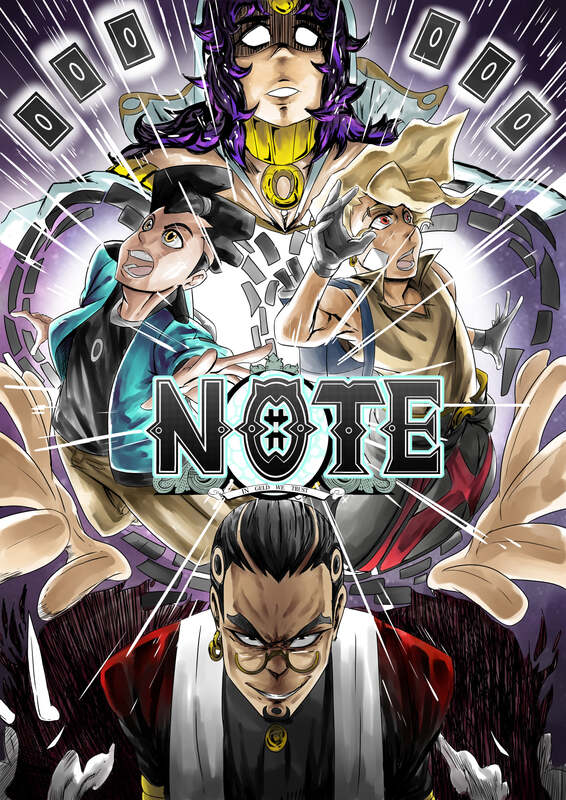
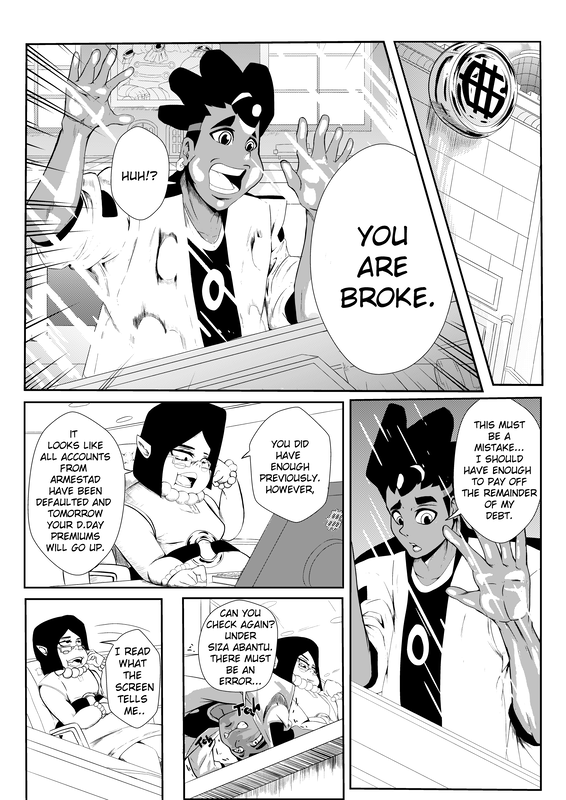
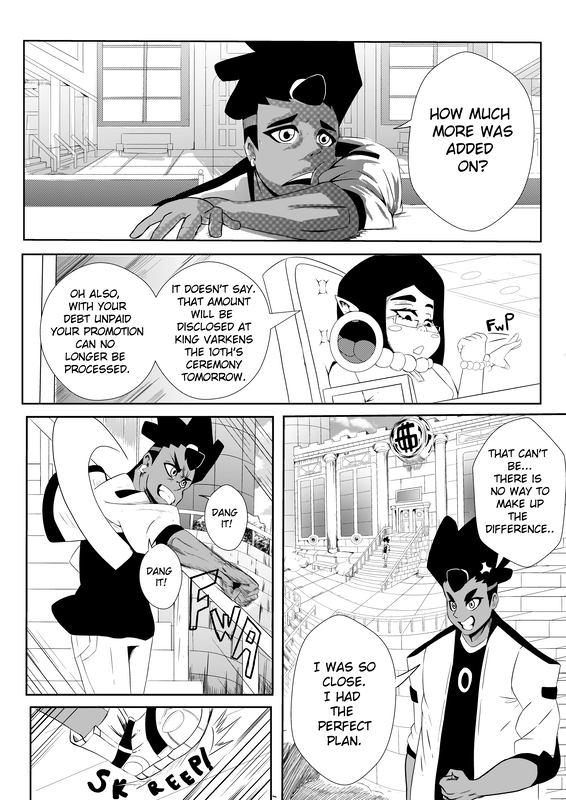
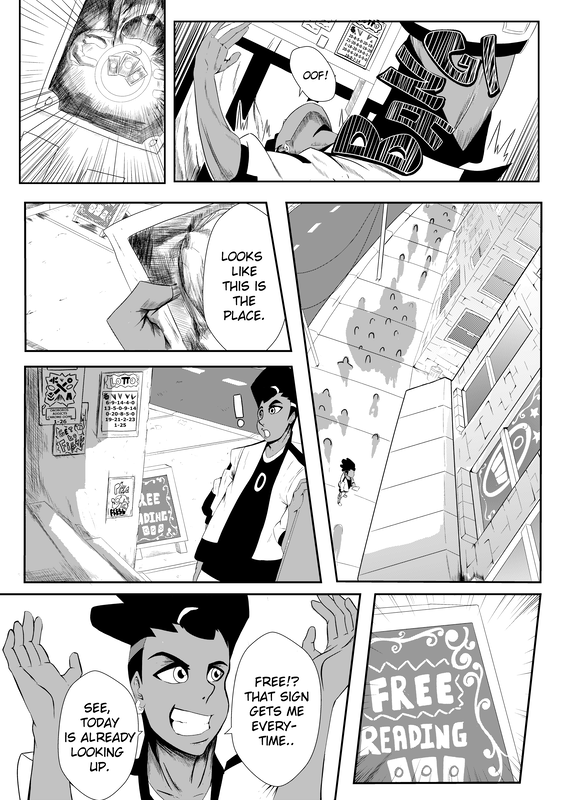
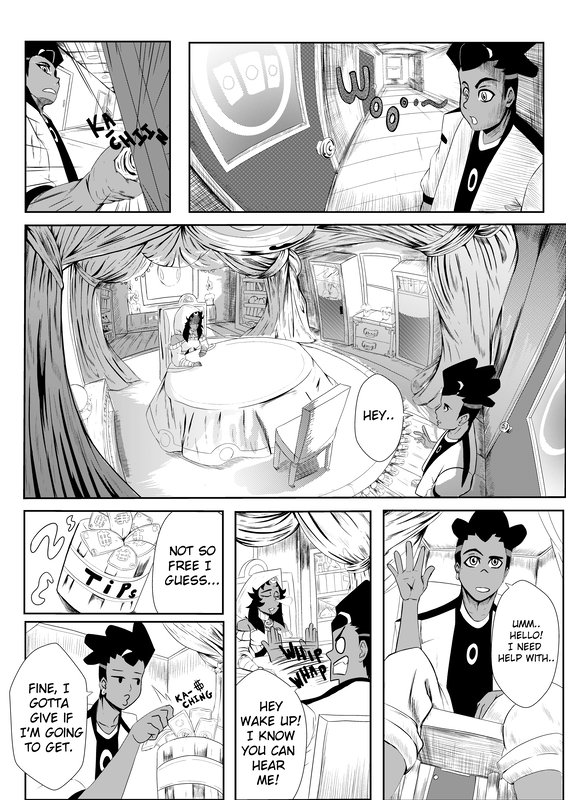
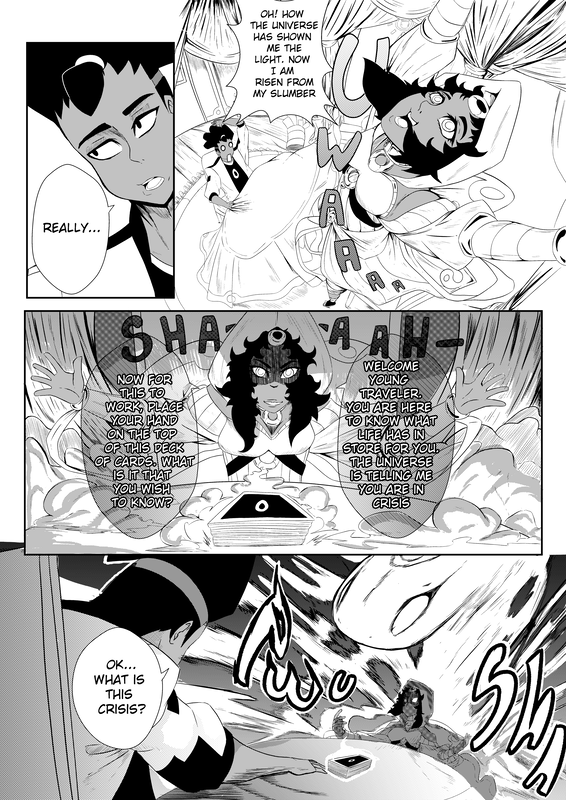
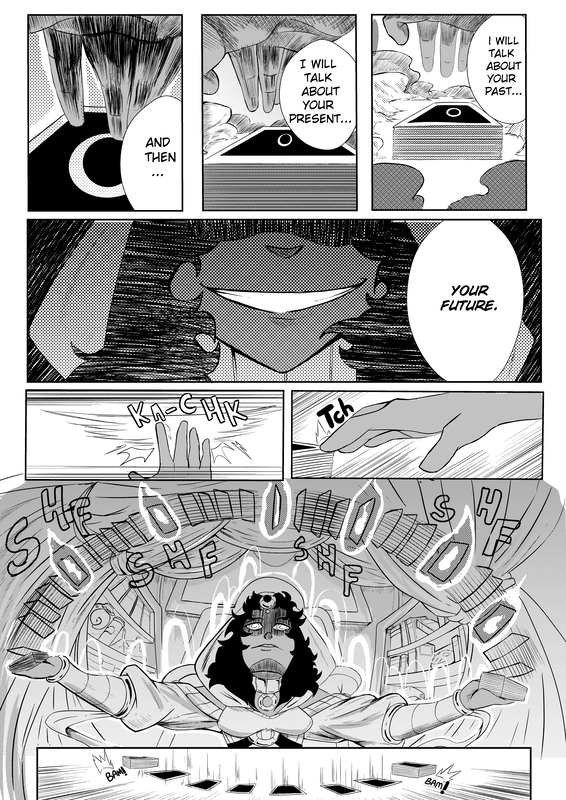
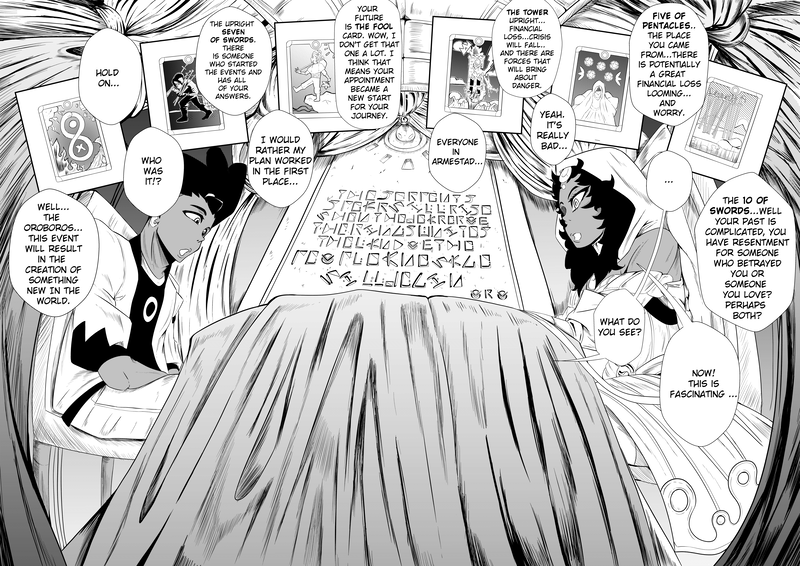
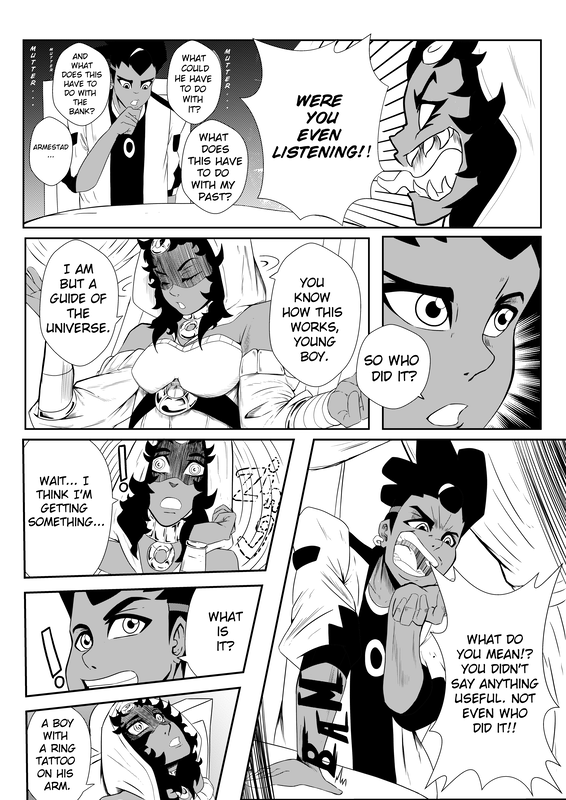
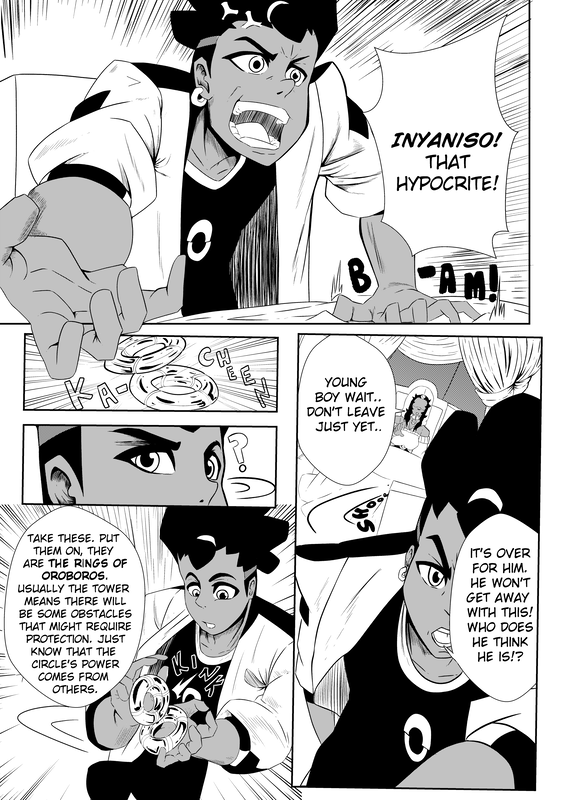
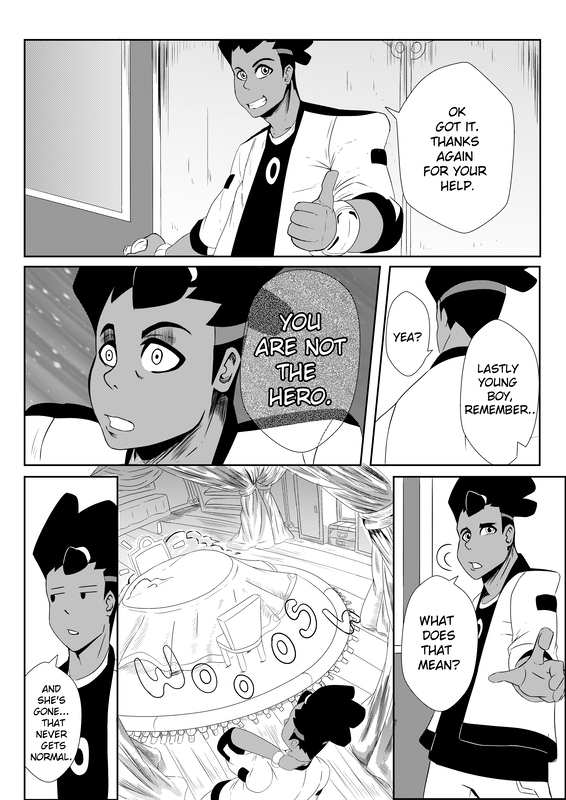
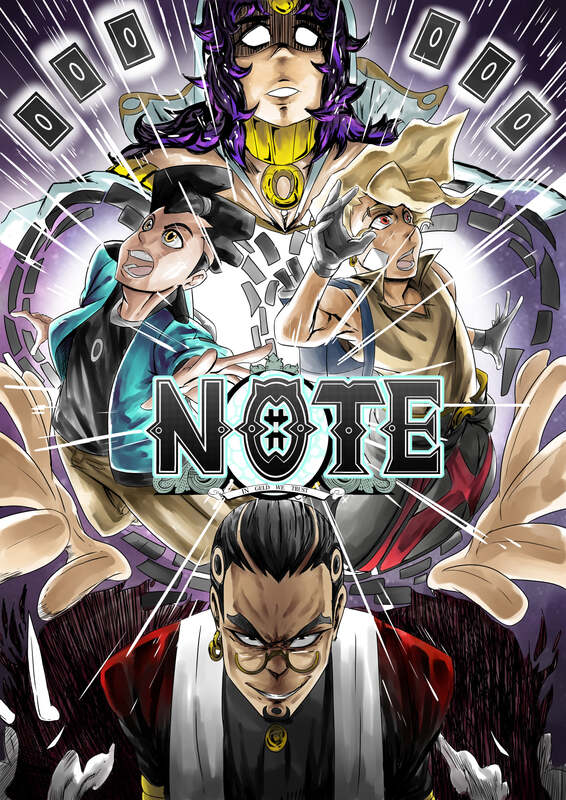
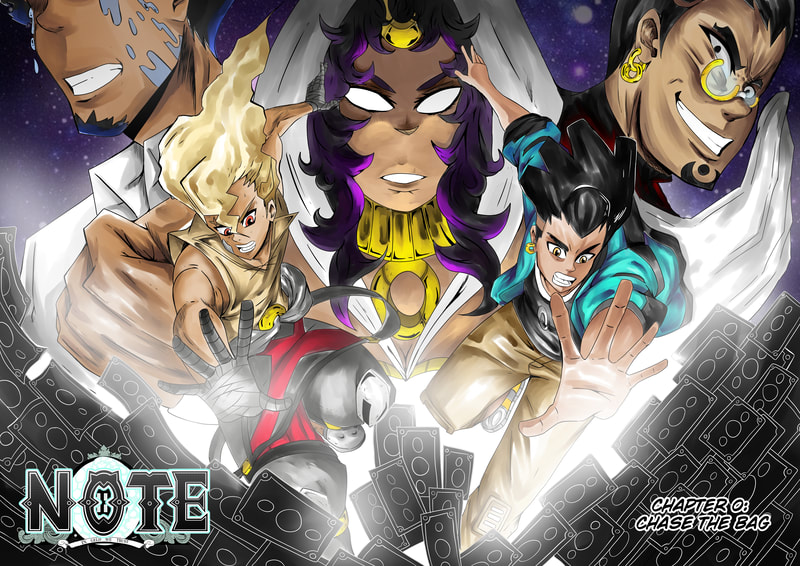
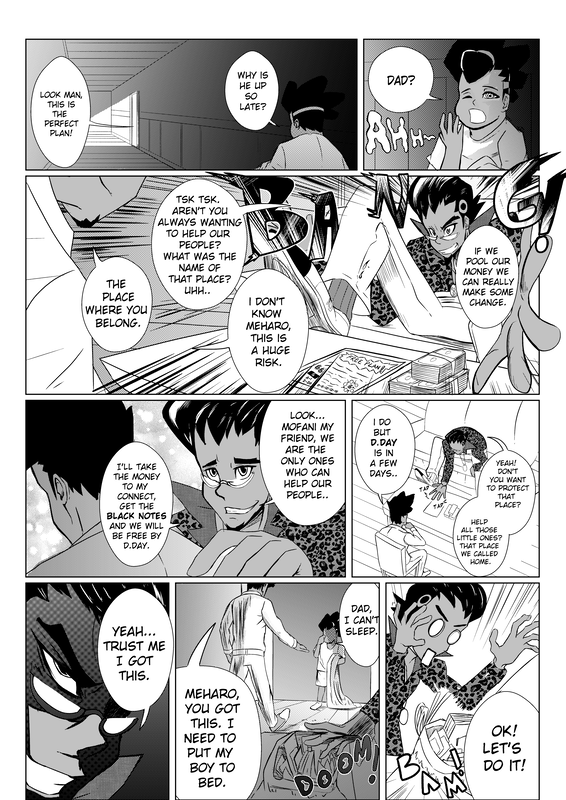
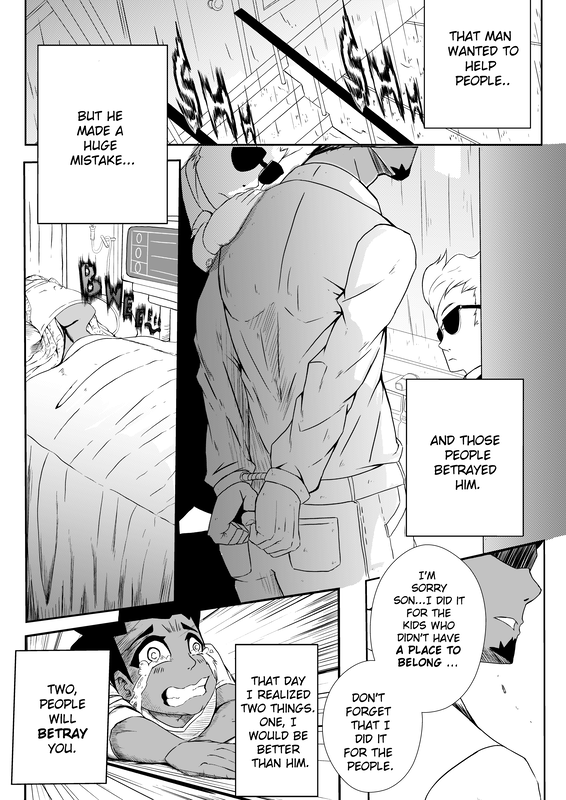
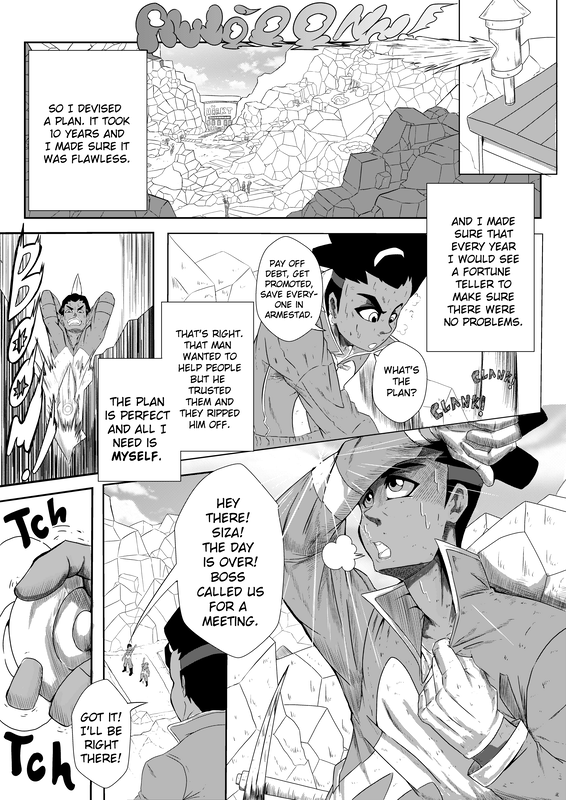
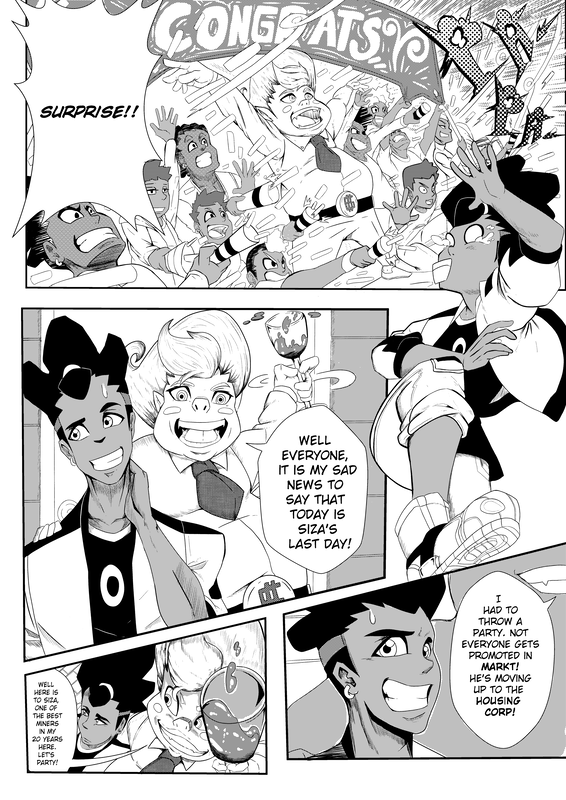
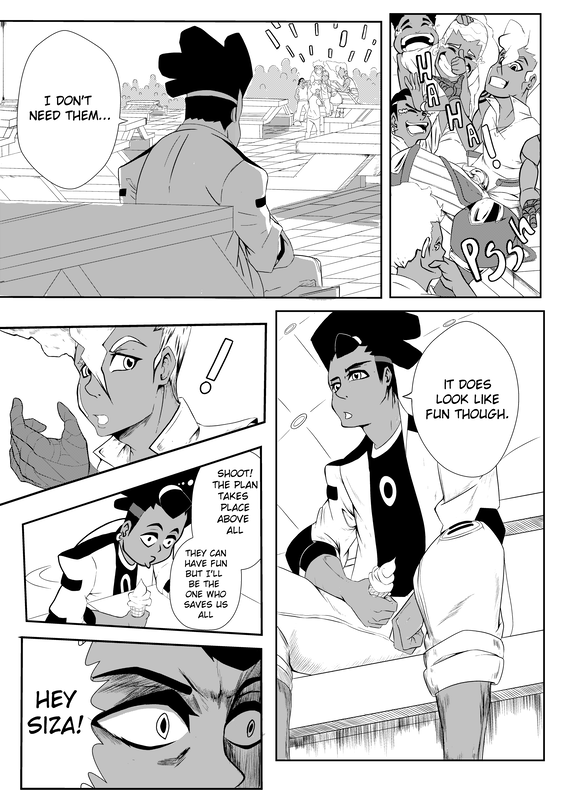
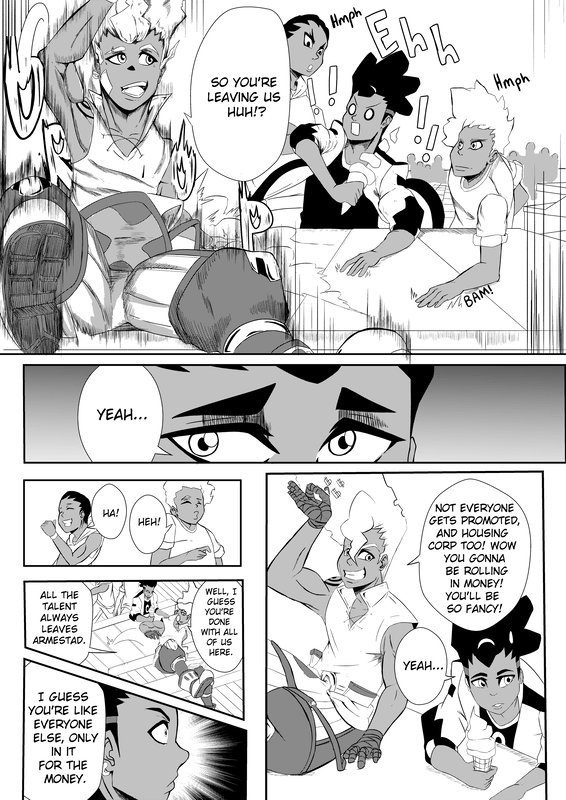
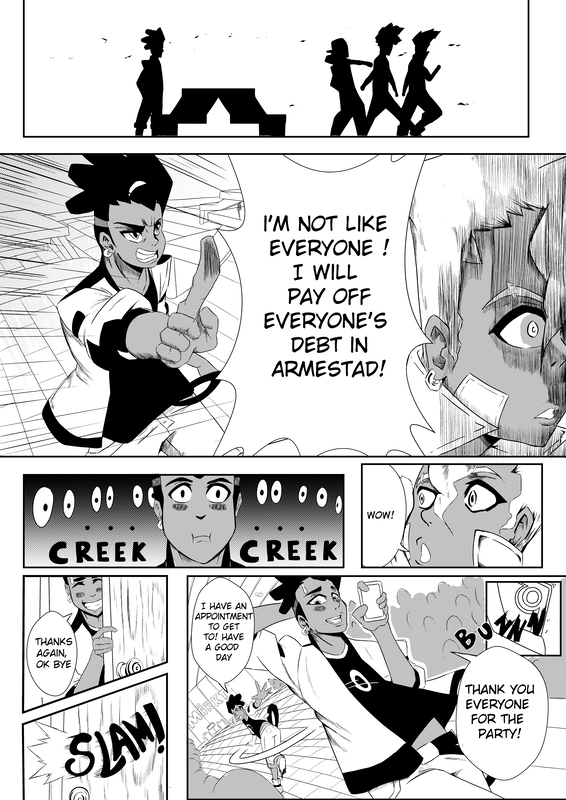
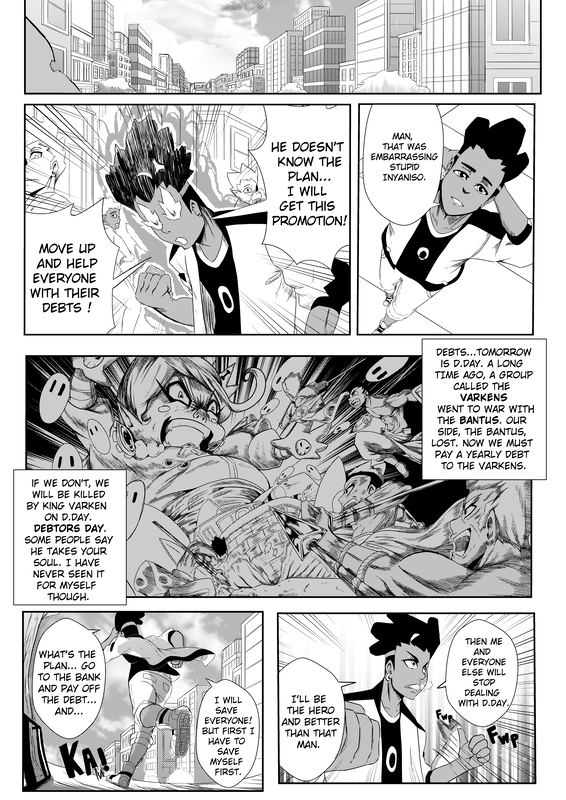
Intro I want you to imagine a boy who read about a fantastical treasure in story books as a child. He would think about this treasure left by the man who had seen the world. So the boy created a map. That laid out everywhere he wanted to go and all the things people that man saw.This boy took the map to see the world and search for the treasure. He saw all the man's sights and started to close in on the treasure he imagined as a child. Now he is at the midpoint of his tale, will he find his treasure he has been searching for?… And that brings me to the topic of today's video Why manga storyboards are blue prints of comics. Now let's get into it. Hey y’all ! it's ya boy Vandel and i'm back with another video in the making manga series and today is the oh so amazing storyboard. But if you have not checked out the other videos in the series I would check them in the card above. Now the storyboards. This is a fun part of the manga making process and is the step right before we start to actually draw our manga. Actually draw? Yeah so let's get into what the storyboard is all about. What is a Storyboard A Storyboard is basically the pre plan to our manga. This is where you can sketch all the ideas from your script. The script and your story board are really close friends. Because they work very close to each other as the storyboard is the visual translation of script and that's the main importance for the creation of the storyboard. Cause you know... we are making manga. But why do we need to even do a storyboard can't we just start drawing our manga. Ok you could do that but let me tell you why you need the storyboard. Why do you need a Storyboard Now if you don't know me by now. Preplanning is what all this manga process is and this is no different even though this is the fun part don't just jump the gun yet. The storyboard is useful because it allows you to properly plan out and structure our manga. This will help you think about the layout, Think about where the panels go, think about simple ideas for your composition and art and where to put dialogue and sfx should go. Basically placement. It makes your process for drawing your manga later clearer and not so haphazard. The greatest part is that it can help you save time. The time saving is crucial because like i have talked about before in the making of my manga for shonen jump video pages when you get to the next phase it can take up 15hr + on a page even if you have a story board. Now image if you didn't you'll be here for a while. How to create one So you decided to make the right choice and not waste your time and you wanna know how to make a storyboard. Ok I gotchu one… ONE WORD… PANELS! But before we get into that boring stuff lets get into this fun interesting stuff. So you are probably wondering where you should create this almighty tool for the manga gods. Well you honestly got the three choices Paper and pencil Computer or chisel and stone. Literally your only options are chisel and stone. Could you imagine? But seriously just make it in a place that you are comfortable with and can have access too. I recommend a paper pencil approach. More so because it's always accessible and easy to work with. But feel free to use whatever you want... I see you reaching for that hammer! Alright now we have our tools. make sure you have your script or this is all pointless. So now we can start the process and everything in this process will live and die with the Panel. Now panels are simply an individual frame. Panels become a comic when we add more frames to the page and then sequential storytelling is born! Boom! Betcha they didn't teach you that in manga school. Wait… There isn't manga school.. I know I just blew your mind. But keep up with me so panels come in various sizes and we will talk about later but the most important is the layout of these panels. Ok I have read a lot of manga and from time to time I see panels organized in a way that don't understand layout. Don't get me wrong art can be whatever you want, but you need to understand the rules of the game before you try to break it and the first part of your layout that will dictate everything is the direction your reader will be reading the comic or manga. Will they be reading left to right or right to left or even just up to down… Or even the 4th way which I really think might be the 4th dimension of comic reading but my theory is still in the beta phase. Let's get back to what we know. Excluding the 4th dimension we need to pick that direction. Now that we have that choice down we can move on to looking at that script. Ok So the script. If you are confused and don't have it yet go look at the script creation video. But now we are going to have our script on one hand and drawing on our other. Yes we are light Yagami!. We need to start our translation. If your notes of your script are good and descriptive then we can start paneling out the page. The issue some people might have now is that you're not sure what size panel or what kind of panel you should use and where. I gotchu don't worry. Now when you think of a panel's size and shape it is more akin to a camera frame and the size of the panel you can imagine it in terms of importance to your story and what you want to show. With the many panels you'll use, the more it becomes a Tetris game to make sure things fit how you want. Now I think a good rule of thumb is that the size of the panel will be where you have the most important visual information. Now what you put in your panel is up to you. There are very conventional ways to approach paneling using film shots for your panel contents like establishing shots that shows where your characters are in the setting etc, close ups to really show those emotional moments or certain facial expression, and POV not used as much but sometimes seeing what the character sees adds to the immersion of their feelings in the moment. There are more types but they will change as you create different panels to show those shots. I would also recommend almost always to use a rectangle and a square for your manga. I’ll talk about this later and creating unique frames needs to be done with a purpose and sparingly to have a bigger impact for your readers. Where to lay your panels? I would always start at the top and depending on the reading direction on the left or the right. Then we need to make our way down in the way of Z till we get to the end of the page. Getting the hang of what you need to put where is going to need two things. One you will need to read and study other manga and comics and see how their paneling is done and how they use them to tell the story and when they do and don't break the rules. Now the next part is to create the storyboard. Storyboards again are very rough sketches of your manga now, if you see on the screen what I drew here will look very different from the final project. Although you are making this to plan out your road map, know that things will change and that's ok but having some idea now is better than no idea later. So now start sketching out your panels first read what you wrote and then imagine what that looks like as a sequence of shots and draw. It's as simple as that. However there are some things I want to talk about to help improve this simple practice. We talked about shots earlier. A good rule of thumb is to vary up your shots. We don't need 10 establishing shots or pages of close ups with nothing but heavy dialogue. What you want is to keep your reader interested in what's happening in each panel. So as you go through ask yourself am I using too much of one thing how can I make it different but still flow well. Ah.. Flow! This was what we talked about briefly in the scripting portion of the video series. Flow in comics how the panels go into one another. This is also about continuity and composition. Continuity in the sense does what happened in the last panel follow into what happens in the next and in terms of composition and how interesting it is to the viewer and clarity meaning that it is complex and easy to understand. Look at the three C’s. Lets break them down a bit more because I want to make sure this is clear and I’ll use Note as an example Continuity is basically how your panel transitions from panel to panel. If your character walks into a room having them instantly fighting a villain in the next panel is a bit disjointed and jarring for the reader. Instead once they walk in they sit down or we see another angle of them coming in. As we progress to the villain fight, we should be thoughtful about how we transition to the next panel. There are two things we need to work on to get that continuity: we need our script and to really work through the scene and imagine the order of events and key into the important parts that are written in our script. It's kinda the acting we talk about in the video on scripts. To understand what I mean about continuity let's look at a page from note. [Pick a page and talk about] Composition is important because in each panel we are thinking about framing everything. I want you to think of the panel as a camera and how it's looking at your character. So with composition what angles are we using and what are we putting in the panel from what angle and HOW! are we putting it how we can arrange our characters and background to evoke feelings in the reader to elevate what we are trying to convey in our story. The next part of our composition aside from art is how our word bubbles and SFX frame in the panel. Do we need to panel break and how does the placement of our pieces create flow in our comic. So in composition you want to make sure you are placing your characters and everything in an eye pleasing way to read and consume. Think about your placement yall! So an example I am going to use is from a page in Note right in the middle of the train scene when the villain enters. The composition here starts off strong as the doors of the train open because in the last page we saw the train suddenly stop. This begins the feeling of unease which is created by and carried on from the last page and is added by the train doors in the first panels being slanted and not head and the sharp ding sound created, alerts our characters to something about to happen. Now when looking at the next panel the camera is angled downward showing our heroes terrified at what they are seeing as the speed lines add weight to the situation and tension. Now the sound effects kick in bringing us down to see what this horror they saw and it is the man they tried to evade earlier walking in. To add to his entrance I place the camera downward to give the reader the feeling that our heroes are ants about to be stepped on by this menacing treat. The villain also takes up a relatively huge space on the page so even though Siza and him are ready to fight. Siza seems small. We also get a few bits of close ups as some important info is told to Siza right before we need to turn the page. Panels are small here and that speeds up the scene going into the next page. So again think about the angle of your shots and the way you place your characters within those panels Clarity now I think is important to have for your manga or we cant read it. I know we all want to fit everything we can into a panel and even a page. But the problem is that, one, not everything can go on a page and two is that less is also more. It sucks to have to work on more pages or be limited by them but we need to work with what we are given sometimes. So in this case think that less can be more. The more clear and succinct you are with your pages and panels the easier your ideas and dialogue will be transmitted to the reader. Because when you pack so much important information into a page albeit being great for the story it can overwhelm your reader and can bog down the flow as they want to know more but it's better to spread out what you want in your panel and dialogue over a few pages then into one. This is a really difficult balancing act. But think about the information overload and how to make that simple. That also plays into composition putting TOO much art work in one section can make something hard to see what's going on so being very intentional with your composition so you can make it clear where you want the reader's eye to go and what else is going on in the scene. Ok now we have Broken down the 3 C’s your Storyboard needs to achieve flow Continuity, Composition and clarity and with some fine tuning it would create amazing flow in your Manga. Now remember Flow is how your pages read from the beginning to the end. You'll know the flow of a storyboard is good when you are able to feel that you're smoothly reading through pages and are not too bogged down reading chunks of dialogue or understanding what is happening visually in your story. Even though it's a storyboard, think about creating the flow here because in the later iterations of your process you will change parts of your structure but creating a strong foundation now will help you later. Now in flow one of the things I talked about earlier was non conventional panels. The use of these page and panel types can break flow but if used right it can enhance that feeling you want to give the reader. So special panels need to have a logic that follows your page structure and make sense to why you formatted differently from the Z format of reading and another thing is it needs to be used sparingly I wont say how many times you need this but if your whole manga is special panels.. Well it's not special, just nonconventional and possibly hard to read and understand and lacks clarity. Let's look at some examples to understand what these non conventional pages look like. Now Spreads are super important. I say that use these for the more impactful part of your presentation of your story , something that not just one page can hold. It's something extremely dynamic that you can use to display action but also using it to move the story along in a creative way. I think the perfect juxtaposition is between the two spread pages I created for note. Basically the use of two pages for a dynamic representation and in an impactful way. Now for the technical stuff about your storyboard can be on paper or digital. I prefer physical and paper because one thing about your story board is that it is small thumbnail sketches. Thumbnail sketches are just small sketches not using hyper detail. This is a big reason why I say you should do physical over digital and this is detail. One thing I find with artists is that we can get stuck in the details. If you are just a writer artist combo don't worry about this point. But Artists if you have to focus on speed, you won't get caught up in the digital details as this is something you can get lost in using digital. Then you can also make any changes or additions in the next section of your manga making progress. Then some small notes to keep in mind. Don't forget to number your pages just to be able to have a reference and keep everything organized. Also there is something that has happened to me where I noticed that the script might need more space than I thought so I add extra pages and this is where the first revision will happen in your page numbers since you could end up needing more or less. So page numbers keep track to not get lost about where your manga will end up. Now you might be trying to speed through your art and there might be things that you forget or want to correct later. Easiest thing is to make a note of it in your margins or the panel you want to change later. A small detail to think about but will help with your later process in case you can't fully get down what you want in your thumbnail sketch. Another thing I got into earlier was about the structure of the page but in the layout we want to be cognizant of something called the gutter and the gutter is where everything can get lost so its the area that's towards the spine of your book. So if you have important dialogue or images in your panel you want to do your best to stay away from that section. This is more important if you plan to do a physical release but I don't think it hurts and helps you think about how each page is in relation to gutter. These are my most simple tips for making a storyboard feel free to do it how you want and take a pic and put it in the comments I would love to see what it looks like for you. I use printer paper and keep my paper horizontal with a crease in the middle to denote the two pages. Now depending the reading orientation i will have the staples to the left or right of story board. Then i would implement all the steps I outlined before to fill in everything. Then we would finish this huge step. Now we can move on to making the manga however next video I want to do a huge in depth guide on making manga in clip studio and potentially giving away a free copy so you can use what you have learned so if you want to be there for this really in-depth tutorial subscribe to the channel and like the video so we can get one step closer to finishing our manga. But now we have the guide map! And thats all I have for you today guys! I hope you enjoyed the video! And that gave you more ideas on a nice process to mankind story board for your manga. IF you can think was there anything that i missed or you wanted me to expand on put it in the comment section down below! But dont forget to hit that subscribe button and like for more and hit that bell for notifications when you want to hear things i have to say! But yeah guys i’ll catch you thin the next one, peace, byeeeeee.
0 Comments
In Today's video, I went over how to create manga a script. This is the next video in the making manga series. Script-making for mangaka is really the heart of what your story is all about. The scripting and the dialogue and scenes are all important to the context of your story. How you organize the structure of the script and what your characters say really can kill your manga before the script has even left the ground. So I talk about acting and how that elevates your character and their dialogue and also makes the reader more interested in the character and their development. I think we all forget the most important part of creating the manga script and that's just keeping the reader interested as well. Then also thinking about the beta readers who will be reading it and their feedback on your manga script is important as well to cover any errors in your grammar as well as your manga continuity and who that all will work. The process can be daunting but it's good overall to get your manga on the road.
Intro Imagine two nations at war. They have lost so many people to this war that they have decided that it is time to sit down and find a peaceful resolution to their fighting. The two nations spoke different languages so they decided on one translator who was tasked with conveying their thoughts. This person was great at translating but was not good at conveying the general's true feelings in their translation and before they knew it the two nations were at war again .And That brings me to the topic of today's video about How Manga Scripts Are Made. But before we get into this video if you're new don't hesitate to hit that subscribe button like the video and hit that bell for notifications when you wanna hear things that I have to say... now let's get into it. Hey everyone it's ya boy Vandel and today we are going to get into writing scripts for your manga. This one should be simple but if you haven't watched the other videos in this series I would catch up to make sure you have everything you are going to need for today! Now what are you going to need for creating your manga scripts? Where should you write When thinking about starting your manga script it's less of what. and more about where and when should you write your script. Now the first thing I would say is that you can use just about anything to create your script pencil on paper, a keyboard, even a hammer nail and stone. Ok well maybe not that one but you get it. Script writing is open to what you are comfortable with. There are a ton of programs out there that you can use and honestly I would stick to a simple word program. For those who are here you know we love to give out templates. So if you're looking for a FREE Template well check the link down below. So Now that you have the Template booted up let's get into how you want to structure the whole script. The structure of your script The structure of your script is super important and should be as clear as possible for yourself or the artist that you are working with to draw your manga. So in a video about how to start your manga I talk about how to structure your manga. What I do there is that I create sections. This Can be seen in your template. The Scenes are going to help greatly with organizing the script and what we are going to put inside of each scene is the dialogue. From your first scene what you can do is put the description in the scene to get an idea of what is happening so the dialogue can flow just as well. Once you have your scene established you can get into what each character is going to say and that is the dialogue. This is a side note to people who are just writing the script and that's you NEED to be as descriptive as possible. I promise you you need to put the details of everything as much as possible so that everyone can know what is going on! Please don't just say to an artist to have artistic freedom. The more detailed you are in your additional notes to your scenes and even what a character is doing the better informed your artist will be of the final product. Dialogue the heart of script Please I am begging you to make sure your dialogue is interesting to read. Don't write what you think the character would say, write what you the character would say. That said it takes knowing who is talking. So know your character, think about their personality and how they would react to the situation and make that natural not forced. I know a lot of manga and anime have done things we have seen but there is always a way to mix it up and that's what makes this so hard. So after you understand your character's personality. We need you to become an actor. Ok nothing professional but this is going to take some practice. Pretend you are your character and see how they would react to the situation and what they would say. This is really hard because in essence you need to become someone else and that's hard. So keep practicing as you create characters and imagine then talking in your head or act it out by yourself. YOu’ll be surprised what you are able to come up with. Now This is going to be the most important part of your dialogue and there are two parts. That's keeping your dialogue meaningful. There is such dialogue that says nothing even though your character in some way has actually spoken but adds no value for the character or the story. That's not to say your character cant be silly sometimes but even in those moments it can be meaningful, maybe it's to break the tension or create a segue for things to come. The point is the intentionality with your words and trying to cut out most of the fluff as possible. The other thing that I wanted to talk about was that the character doesn't have to say everything that is going on. Exposition has its place but that's why we chose to write a manga and not a book. So be deliberate here and make sure you are not just saying everything that is going on. The absence of dialogue is best to key the reader into those important moments to be seen. Like a revelation to themselves that they saw what's going on. That's really good. It shows your trust in your reader. I would say practice this more so it can be more fluid. Because sometimes you yourself the author thought you were so clear with your picture but the reader is like what just happened? Work on that exposition it definitely has a place but it's definitely on every page explaining how everything works. I think this is a nice point to put in for your dialogue and the scene actions. So what's happening as your character is talking. I like to include them in certain scenes or in general. It will really help you when you get to the story boarding phase. So the more detailed you are able to visualize the scene and what's happening the easier it will be to draw. So as you can see here are some pages in Besieger where I use it but it's peppered throughout the whole manga. Take a look to pause and see how I use it Now back into the last bit of dialogue. Sometimes when their character speaks not everything needs to be said at some points. Like when you’re talking you don't always lay out all of the cards. Just like when you wanna make sure you don't say everything. It can help keep your dialogue concise while making the reader want to know more about what is said and maybe to bring that up at a later point as that may be important. I believe in the small things and rewarding the reader for catching that later. If you have an invested group of people then it'll definitely get to them. With that the last part of the organization and dialogue is the page number. That is super important just to know what you are going to put on the page. And how much can you actually fit. What I like to do is keep it to 6 or so lines of dialogue but I also like to keep that interesting action of dialogue to get the person to want to go to the next page. So I try to pace it out like that. Its not easy to figure it out but the more you make manga the more you’ll get the flow of how many pages you’ll need and the amount of art that is going to go with the dialogue. This is something ill talk about in another video but your flow and pacing will be impacted a lot think a lot of dialogue will be a slower page and one with less might move faster so that gives you an idea oh how you can arrange what you want to put where. Now Let's go into the end game after you finish your first draft. I highly recommend you have a friend read it and not a friend who will say everything you write is the next HxH some constructive feedback is key. Make sure you are getting that feedback and to do that you need more than one opinion and take the notes they give you and make another draft. I think a good idea is to diversify your reader: maybe someone who is familiar with your genre, someone who isnt your friend as well can give you proper feedback and maybe someone who knows nothing at all which is important to see how someone who knows nothing about the genre and how it goes sees your story. They might say a lot, maybe it's too bloated or your pacing is outta whack and it's going to suck to have to keep going back. However what is good here is that feedback is coming from different angles and you can see something that you might have not noticed otherwise. I know you spent so much time trying to get this script together but don't worry you want to create something great you gotta put in the work. So make another version and rinse a repeat to see what needs to be corrected till you get the right version. I will say that it took me about 4- 6 versions before I got to what I wanted in NOTE. Something I will say for those without a deadline at a certain point you will need to just continue on with your story and not to stay in the revision process too long. Because you wont make it perfect and as great as the feedback is you need to get on to the next stage in creating. Ok done with a Vandel PSAaaaa. When you are on that final draft. Let your beta readers go through it one last time. Let them give their final thoughts.But before you get their final thoughts you need to make peace with what you have created and understand everyone will have critiques and that's ok because this is art and art is subjective to people and what might not be for all might be for some. That said you will have them do one more pass and this isn't for the story flow or anything this is for the spelling errors and grammar or just weird speech unless intentional. This is going to happen here and towards the end of the manga but to make sure you aren't making it twice and small errors should be pointed out here to have a clean script. Now this isn't necessary but I like to have a physical version of my script made. Just sometimes computers aren't accessible or something isn't charged if you can. A physical copy is always a good backup plus it makes people see you as professional. YOu can be like oh here's my script ooouuu fancy no ok… A digital option is just as good so that you can take it with you but it just might be my old school nature. But its up to you at this point. Now once you have gone through this your script should be shaped up at revision 3 which should be good enough to get started storyboarding. Some things to remember: Structure will make your script really easy to read and follow what's going on. Create dialogue that is meaningful to your character and your story. Work with not telling too much and balance that with showing and leaving somethings unsaid to get your reader to wonder. Have some beta readers read what you made, take their notes and make revisions. Overall if you follow these I think the clarity of your script will shine and really help you for the next phase in our journey and that's when we are going to talk about STORYBOARDS! But that's all I have for you today ! I hope you enjoyed and learned something you can use in your scripts you can drop a like. If you want to see what we will do with storyboards click that subscribe button and that bell so you can be alerted when we do! But question what's the worst part about scripts? But till then Ill catch you in the next one. peace BYEEEE. When you are finished Have people read it beta readers are best for feedback Make another version Have some one read for errors in spelling or simple grammar Print it our have a physical piece with you will be helpful later. This video is all about my character design process for creating characters. The way I go through the process of character design. This is the third video in my how-to make manga series and it's all about creating characters and specifically on design. I got through all the things you'll need to make sure you create Cool, Interesting, and memorable characters. Using design examples from popular shows like Dragon Ball Super and Even Naruto or Boruto's Dad whichever works. I also explain my process for my own character design going into deep meaning. The Key to all of this is making super that our characters are memorable! We don't want the world to forget the hard work we have put in to create the awesome characters! So by following this video you definitely will have the character design process down and be able to use it anytime when you are creating a new character.
Intro There was once a man who saw the world as unique. This man was deeply inspired from his futuristic world. Many people who were born into this world were uniquely a product of many ideas put into one. However, this man wanted to create something of his own. A child who was both human and machine. He took inspiration from everything to create this super child, hands, feet, insane speed this child would have everything. During this time the world would go into darkness and his creation would be the one to stop the coming threat. Now everything the man used to create this new child would save the world! And That brings me to the topic of today's video about The Manga Character Design Process. But before we get into this video if you're new don't hesitate to hit that subscribe button like the video and hit that bell for notifications when you wanna hear things that I have to say... now let's get into it. Hey there Everyone Its Vandel Here and this video is for people who want to elevate their character designs or are simply new to this process. If you are either of these well this is the video for you. This video is inline with my series on the steps to making manga so if you haven't seen the other steps check those out In the link below. Now, At this point in the process I would make sure to have an idea of some characters I want for my series... if you know what I mean hehe… You know when it's time to create the dialogue for the script you need an image of the character gosh. But one of the best parts of this process is the excitement to draw new characters. That excitement brews inspiration, maybe it's something you read or watched but your creative juices are flowing. But I would say lets take that excitement and find out what caused your great burst of excitement in the first place. That begins with our research. Research Other Characters Let's get into the Research. There are two kinds of research that I want to get into. The first kind of research looks at the characters that you like. You know characters you like [ Boob] WIth great character and design and personality [ muscles]. Research all the characters you like and create a pinterest board for all pictures you like or whatever works for you but have a place you can refer to later it will be important. Lets call it a reference board or character board whatever you want. Now what you need to do is write this part down or make mental notes about the characters you just collected. Take your time to look at the characters and see what you like about them and what you think works for them. Is it their face? is it their hair? the way they stand. The more detailed you are with figuring out what you think works the more you'll understand about your own character and their design and what works for them. For example let's take a look at goku who has a unique spiky hair pattern. His muscle build is unique and the use of colors blue and orange make him standout and he also has his giant muscles to denote his strength. There is also Naruto who you could argue is a Goku clone but I think this is a great example of inspiration. This is enhanced, with inspiration to make a more interesting design with your character. Naruto’s spiky yellow hair shows us his rebellious nature in the beginning of the series. His orange and blue is an allude to his desire to stand out and to be noticed. But I also think it's a nice nod to goku and his color scheme which is something we will get into later. His slender build works for him being a shinobi and not a body built like goku. Can you imagine Naruto like Goku? Naruto adds flair with his unique with these whiskers on his face. So as we see here we can do this for every character breaking down what works for them to increase our ideas that we can use for our own character. This research type is to have a general understanding of what works for popular characters in the series that inspire you. The next type of research is more specific as this will apply to your character that you want to create. Just like you did before you are going to look at characters that have some facet of what you want your character to have. So what you do next is pick as many characters as you can to find that fit what you want your character to have. For Example Big eyes, a particular style of hair, a certain accessory. For this I would recommend another pinterest board for your specific character Instead of noting what works for the character look and what you think works for your character that you have in your mind. Now you're not making a 1 for 1 translation but using reference will really help you with your creative process and expeditie it. So you can see what you need and draw it. That said not every character will have what you want or exactly what you need so I would add this to part of your research and that's to look up fashion and clothing or weapons or accessories for your character that you were unable to find. I did this in the creation of bomo in two ways. I first looked up a lot of characters that looked like Mugen from Samurai champloo so that included Devil man crybaby, and Megolo box. I mixed in the sash from Chamloo for the head band. The hair from devil man cry baby and then I needed that extra fashion so I added street clothing to add to his toughness. I might have sprinkled in a bit of blue exorcist and even some kingdom hearts in his design through those huge sneakers . I took a little bit of each character part I liked to create Bomo and that's what you can do to heighten your design but we really need to develop our ideas here and that's where we need to keep things simple Keep It Simple So here we are ready to put pencil to paper or apple pencil to ipad. We have our research notes from what we want in our character. We need to make a sketch of this character because they need to take from. But one of the things here is to keep it simple and not worry too much about the final result. Let's just get our character to a place where we can say we like them. Let's start with shapes and breaking them down to see what kind of build they have. Are they built, skinny, round, or fluffy and what does that do for the character in the context of our story? So normally I would think about the skeleton of my character and how big or small they are. That's something that can make them stand out very well and look at Allmight who has two very different character designs. One inspiring and the other you hope the wind doesn't blow him away and in the story we know why he is this way and that adds so much more to the design but also tells us a lot without us even needing to know when we are first introduced to it. Now one thing as we draw as artists is we tend to add too much detail. Now I'm not saying go stick figures or not to add in some of the ideas but there is a balance and some things can come later or some ideas you have can be noted here but we just want the idea of the character. Their Hair maybe? what they wear and some important items work here, important accessories, Dont worry we will go in on that portion later but lets build that solid foundation first. Ok now you might ask isn't it important to get everything down now. Well yes but also no. That said your character as they are now has to and will change and that's ok but that's why I don't want you getting settled in their looks just yet is because I talked about it my creation of Note video but I went through about 6 - 10 drawings of characters to flesh them out to their final form. That's what I recommend you do as well but we will get more into that later. I don't want you to get into many details of your design and keep simple because over the course of your series you will draw your main characters hundreds of times in addition to many more characters inside your manga. Now while you don't want your characters to be basic you want them to be impactful and memorable BUT also reproducible to your skills. So as you might want to go into intense detail with characters like Guts from Berserk and that's great. Your skills might not be there yet to reproduce those designs in an effective and timely manner. It's also going to be impossible or at least not worth the effort you are going to put in to do that. Again this is a balancing act that you need to find with the characters you want to create and the artistic skills you have. So try your best to keep what you want. but make sure you can do it consistently and if you can practice and adjust your design till you are able to, go for it. Ahhh how I love the challenges of balancing what you want and what you are able to do. It's a sad tragic tale. Now this is the last piece that will help give your character .. their character. Now what do I mean by the Character let's start with the Pose [ Jojo Pose] This might be something that is a meme in the anime community. But I think the memefication of this just shows how impactful it is for a character. If you look at how a character stands you can see if they are brave, afraid , aggressive and so on. For example L from deathnote how he sits and reserved nature, The way Almight stands ready pumping his chest ready for anything or even shikamaru and his laid back look being aloof. You get a lot from a character's pose. Here you are shown the base of your character as they will have many more emotions but who they are in their neutral state will be best shown in this pose. That's why a lot of people who create their Oc’s initial drawing can seem still and stiff with not as an emotional feeling through their characters pose. It's usually the general front showing pose. But when you are showing the world your character show them someone they want to get to know more and make that interesting. because generally aspiring mangaka will hit the same pose which I think is good initially but to understand your character. Pose them in a way that lines with their personality so your viewer is interested as well as you. It's great for adding that last unsaid feeling to your character that can be conveyed to the reader. However the next part is what will show the true strength of your character's design. Strong Silhouette Ok here lets play a game Its called Guess that character. So on the screen there will be a few characters and I want you to guess who they are don't worry I’ll give you a few seconds to guess who these characters are.. Put your guess in the comment section Alright you probably got the 10/10 and you should have. The thing that all those characters have in common is a strong silhouette. This is the perfect test to see if your character design is strong, cover your character in black and see what stands out and what doesn't. Does the hair pop? does your character's important item stand out and what does the pose do for you to know what the character is about. Your design should stand out and should be readable to those who are viewing it. Again this goes back to the simplicity of your character and the shapes that are used to create them. Again make your character distinct and something that will catch the readers eye. But and I say this, don't just make your character unique and stand out for the sake of being flashy without reason. Your characters design is inline with your story creation. You should know why they look the way they do and rationalize within your story then go wild. The most important part of creating the silhouette is when you subtract all the bells and whistles of your design to see what still holds up and is unique to your character design. In this way you can see the flaws of your design and what you can go back to, to tweak and make stronger and standout. This will help elevate your design to a higher level. So Just a few mins ago I said don't make your character designs flashy. That again is in the context of making your designs flashy for the sake of doing that. But do exaggerate. I will say that make your designs unique so they have a better chance to become memorable. Think about one piece and how Echiro Oda really plays with every part of his character designs as it adds to the diversity of the characters in his world. In addition there is a consistency to that madness making it more a part of the world and thus it is normal for his style. The unique body proportions will help the visual strength of your character designs to standout. It's a hard balance but I think weaving it through some of your characters will give you a diverse ensemble as well creative looking characters. Now we need to bring all of this together into this process. Character Iteration In the end we all grow and change but here is where we need to put into perspective all of what we have learned. So now that you have a loose idea of your character. What I would do at this phase is re-draw that draft we started with in the beginning and this is the beginning of our character iteration process. Instead of the full body I would begin with the head, face and hair. So let's go to the example of Siza from Note. I gave him a unique Dreadlock hairstyle style with a side fade Gotta make my man look clean. This gave his hair a dual meaning that appeals to his culture of the people he wants to save and the clean shaven look to be accepted in the workforce and society as a whole. I didn't want him to have a hardened face to allow the reader to better empathize with him. The earring he wears shows a connection to his people as its a symbol of servitude to the Varken overlords. I worked on this design a few times and then went to the full body. This is where I played a lot with his style. I drew Siza A LOT in many different ways. I wanted his style to feel futuristic but contemporary and not someone who is sooooo detached from his cultural group. To do that I used the motif of the circle which is culturally importnat to his people and kept him connected to them. But as you can see I was trying to find a way to include it but not totally take over the design, since it could be distracting. But I was able to keep the jacket and simplify it and minimize his clothing to also add to his personality as someone who is focused but not thinking about clothes necessarily. But there are so many versions of this one character I eventually landed on this. And this is what I mean when I say iterate. Don't just draw your character once. Sometimes you'll get it on the first try but the more time you put into your character the more variations you can see to decide that you might like more. There might also be the fact that you just like that one design you made, but the nice thing about all these designs is that you can use them in your time skip or to vary up how your character dresses. But that said I would do up to 10 and then just tournament arc it down to decide what you like. Which one do you like best let me know in the comment section down below. Once you have decided what you want and picked a character design it's time to make a final reference sheet or what you would call a character sheet. What goes into the character sheet is up to you or to whomever you are working for. That said I think there are things that should be in the character sheet. The first part is your character… thats obvious. But really you want is a full body rendering of your character and you want the back and front of that character. You can have more angles this is just to help those who would need that reference as you will be drawing this character in many different angles. Included in this I would show the head shot since there will be times you will have close ups and such and in addition you might want to have a facial emotion chart of your character as they may go through a range of emotions during your story unless they only have one emotion or wear a mask. I think that posing will also help understand how other situations will look for your character. How will they be sad, mad, and or happy. These arent all required but the information you have on your character the less thinking on the spot or on the fly changes you'll have to make. Now with everything finalized there are a few things you might wanna think about at this point or maybe even in the iterative process. The Cherry On Top We have now created a solid character design through rigorous repetition and hard decisions. But one of the things I hinted at but didn't go into was the accessories. This is the most fun part of creating your character. Letting them have all this bling is great. I think I can't say don't go overboard, but do what works for your character, give them a sword, a scarf , heck put bandanas on their eyes. GOSH Why didn't I think of THAT! Sorry. That said look at everyday items and see how they can work with your character. For example I used The ring motif with Siza when he transforms and used them as his weapons and even put that in his hair. And even gave him a cloak when he transformed to make him look really cool. Lets look at my other character Bomo look at the head band earrings and even horns just to see so much there even with the torn sleeves on his hoodie all add to how awesome he is and to also show off his Besieger tattoos. So make your accessory stand out and something that can be subtle but adds to your character to make them unique and unforgettable. This is the last part because usually in manga Color is not used too much except for your cover art and spreads normally to save money. But if you are looking to have an all color manga or just want to have that reference this is always good to have so you can know when it's time to do that. So remember we talked about Goku and Naruto earlier and how their color was used to make them show up and show out and your eye is directed to them.Your color just like everything else should reflect the character in some way and in some instances not but have it be meaningful so it is memorable. Like for the characters of the Paranormal Club in Besiger I have the colors for each of the colors inspired by the samurai champloo but also are emblematic of their character types except for one. Can you guess who? That said Bomo is red for the rage and the other visual elements add to that bad boy aesthetic. Bat with refined aesthetic looking fancy but a bit of sleuth behind his appearance. Lastly Pix who is very bright and showy but she isn't exactly all that expressive as her palette and there is a reason for it. Like if you wanna know more about besiegers. Alright let's put this all together. You wanna research all you can on your favorite characters and what they do well. Look at what applies to the character you want to make and use your inspiration to put that character together. Keep the design simple and keep on adding to it and make many drawings before you get to the end of that character's design. And then style them up and make them unforgettable but also don't forget to make them memorable. Yeah Memorable.. And that's all I have for you today if you made it to the end of this video you are amazing thank you again. Question: What is the hardest part in character designing? Don't forget to subscribe if you haven’t or hitting that like button and clicking that bell for notifications when you want to hear what i have to say. Alright y'all I’ll catch you in the next one. Peace BYEEEEEEE Traditional Art Vs Digital Art Materials in 2021 Which Is The Best For Creating Manga In-depth Guide7/8/2022 When you start creating manga you need art materials. This whole video is about whether you should go digital or traditional. In creating manga there is a lot of discussion on what did that person use to make their manga. Is clip studio a great program? Do you need the Ipad pro to make our art finally make that leap? Will digital art make you a better artist overall. What I will say to all of that is don't think that any art material will make you better. That said I wanted to make a guide for the second installment of the series on how to make a manga. We need this part because materials are very important to the process. I think this video will also help with the mindset that we aren't like Dragon Ball Z characters like Goku going ultra instinct but more like a Hunter x hunter character and thinking how to use our skill with the tools we are giving and growing from there if that makes sense. There are a lot of traditional art materials like how to choose a pencil for your manga ? or what paper should you use for your manga? Or even what kind of ink works best for creating manga? That said I don't go in-depth on how to use tones but I will gladly go into it if people express interest. As for digital, I talk about what computer would be great for creating manga? Which digital program you should use is photoshop better for manga? or is it Clip studio that is the best manga program? what even is clip studio? What should you use for your tablets going into Wacom tablets and XP pen and Gaomon and Huion comparing what tablets are great for you? I hope this guide is helpful there is a lot of info in this and I hope it helps with your manga making process.
|
Vandel. MI create content to help Manga and Comic book Artists craft their stories and artistic skills to tell the stories they want to tell ArchivesCategories |
 RSS Feed